Glow Up to Grow Up: DIY Rise & Shine Spray for Indoor Plants

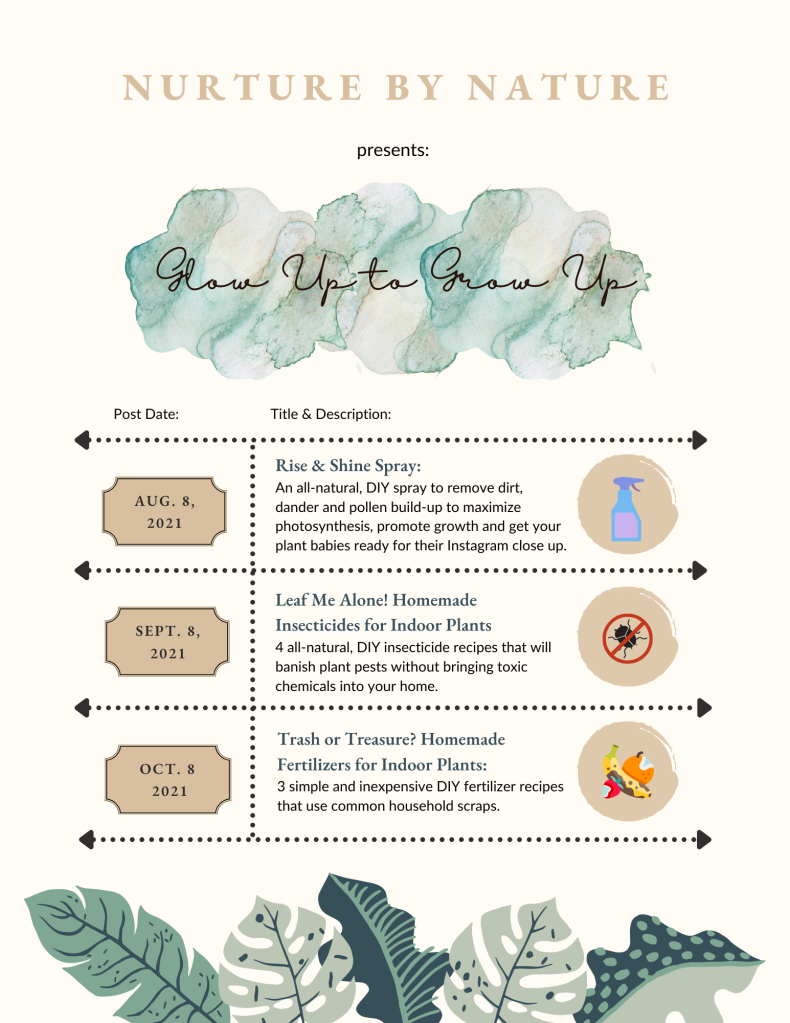
In my post for my Glow Up to Grow Up series, I will be sharing a recipe for DIY natural leaf shine. 

What’s leaf shine, you ask? 

Have you ever brought a new plant home from the store and noticed how shiny its leaves are? If so, it’s likely because the plant was treated with a leaf shine product before you purchased it. 

As a former florist, I know that there are numerous commercial leaf shine products on the market. Leaf shine does what its name suggests, and many retailers use it to make their products appear more desirable to consumers. Indeed, commercial leaf shine products are purely cosmetic, and in fact, many store-bought varieties can be detrimental to plant health. 

In addition to harsh chemicals, many commercial leaf shine products contain oil or wax. While these ingredients give leaves an impossibly glossy, perfectly lustrous finish, they can also deposit onto the plant and cause buildup. This is harmful because plants breathe through tiny pores on their leaves called stomata, which are easily clogged. While clogged pores might result in an unsightly blemish for humans, they can result in suffocation or death for our green, leafy housemates. 

The natural accumulation of dust, dirt, and dander can block your plant from absorbing light, thereby affecting photosynthesis and your plant’s ability to grow. For this reason, cleaning the leaves of your plant is an essential part of maintaining good plant health. While it is by no means necessary to use a leaf shine product, I recommend making your own so that you can control the ingredients.

The following recipe will not give your plant the high shine look, which is incredibly artificial. Remember that your plant is a living, breathing organism and that leaf shine – natural or otherwise – is no substitute for regularly cleaning your plant’s leaves. 

The process of polishing your plant leaves begins with cleaning. Here are two methods that I like to use. 

  1. Sponge or Cloth: Remove any excess dirt and debris with a damp sponge or cloth. Make sure to support each leaf with one hand, gently wiping down the leaf and away from the stem with your other hand. Don’t forget the leaves’ underside, which is a common hiding spot for houseplant pests. You can also use a soft brush for leaves that are especially small or delicate (I like to use an old paintbrush or eyeshadow brush). 
  2. Shower: Another method that is particularly useful for larger plants, or ones with leaves that are difficult to wipe, is showering. I live in an apartment, so I generally water my plants in the shower anyways, and it is a fantastic way to give your green friends some extra TLC. It is important to use lukewarm water because plants don’t like their water as warm as we do, and cold water will shock their system. Be sure to gently run your hands through the foliage and hold the plant at various angles to make sure that the water hits the undersides of the leaves too. 

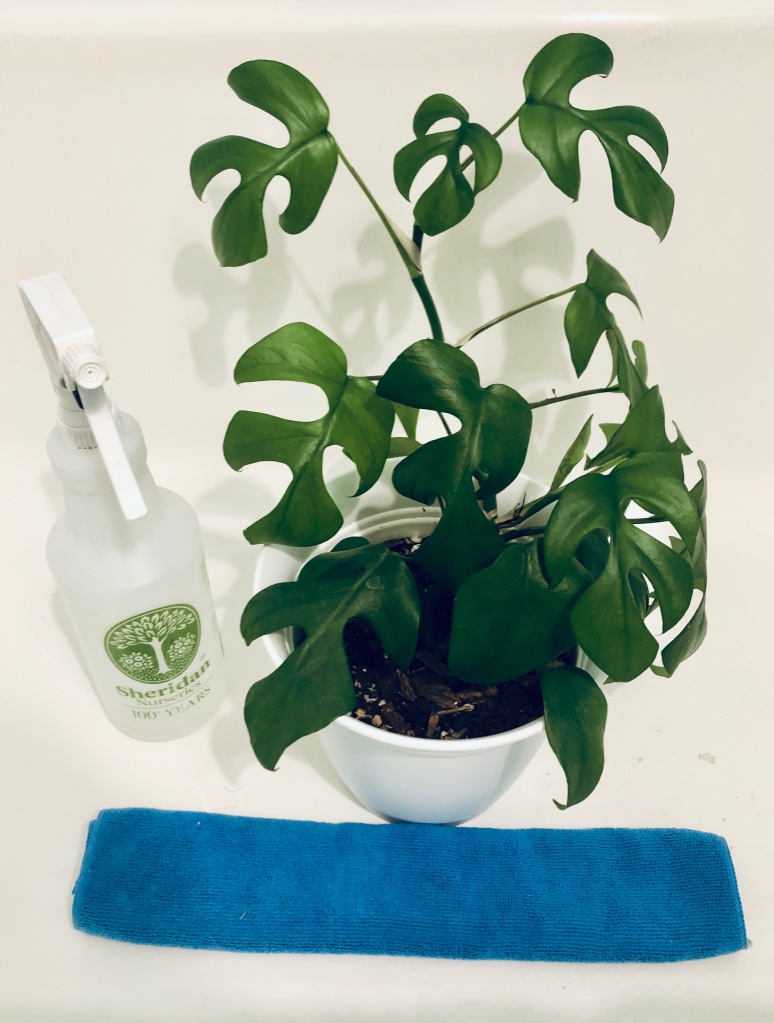
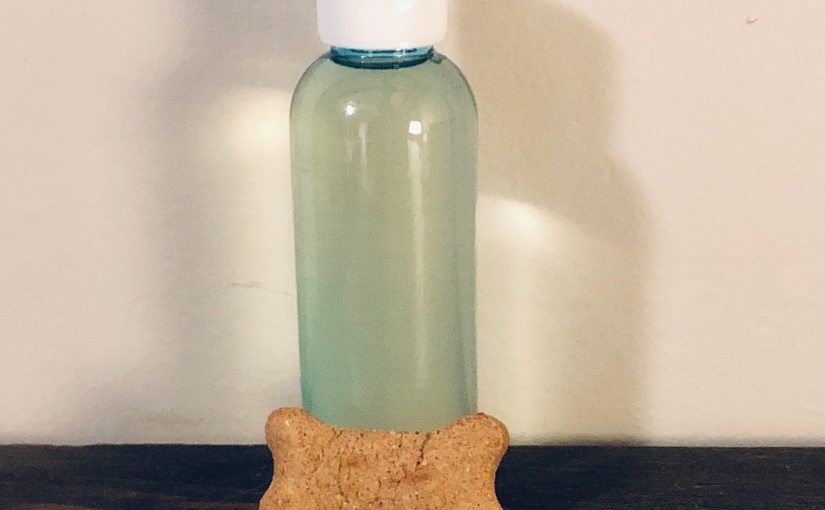
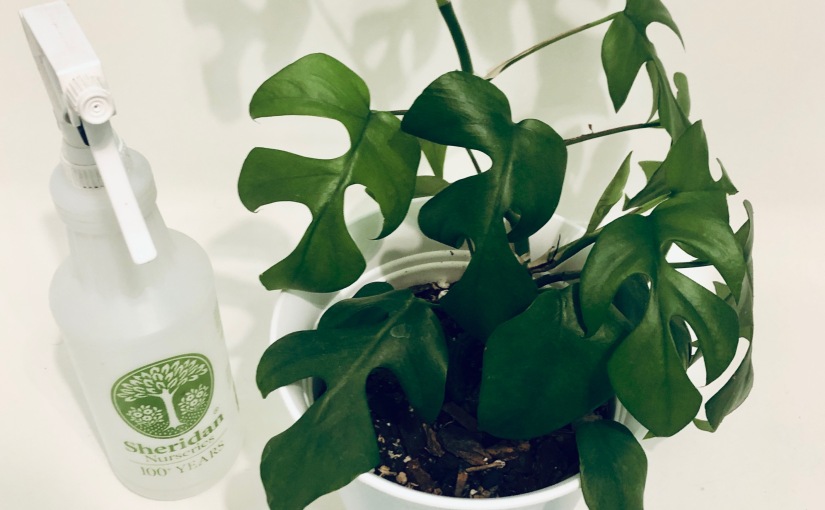
If you’re still lusting after that glossy look, now you can gather your ingredients and supplies for my DIY Rise & Shine Spray

How to Make DIY Rise & Shine Spray
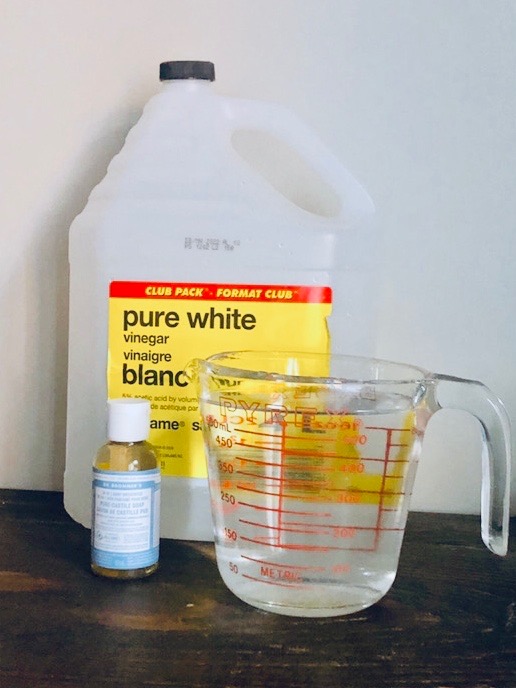
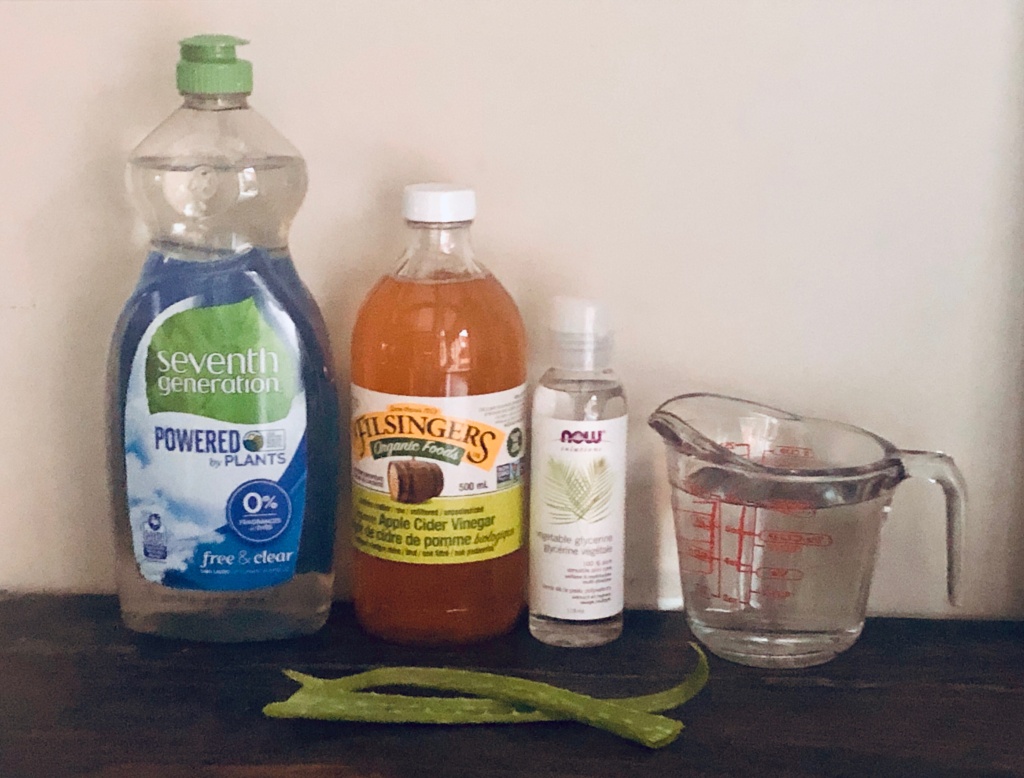
Ingredients for DIY Rise & Shine Spray. Image by Hannah Neufeld (2021).

Ingredients: 

  • 2 cups water 
  • 1/2 teaspoon white vinegar 
  • 2 drops Castille/dish soap (I love Dr. Bronner’s). 

Supplies: 

  • Empty spray bottle 
  • Microfibre cloth or paper towel 

Preparation:

  1. Put all ingredients into empty spray bottle and replace the nozzle.
  2. Shake thoroughly to combine.

After mixing the ingredients, you can either apply it to the leaves with a spray bottle or simply dip a cloth into the mixture. I recommend using a soft, microfibre cloth to protect leaves from damage. Another option, if you are concerned about spreading pests between plants, is to use a disposable paper towel for each plant. When you are using the product, be sure to support each leaf with one hand while gently wiping down the leaf and away from the stem with your other hand. 

*Important note: This spray is safe for use on certain types of leaves only. I do not advise using it on delicate foliage, including plants with fuzzy-textured leaves, succulents, and air plants, among others. If you are unsure whether to use leaf shine or want more information, Larry Hodgson of Laidback Gardener wrote an excellent blog post in 2018 called “Do You Really Need Leaf Shine Products?”.

While leaf shininess is not an indicator of plant health, keeping your leaves free of dust can aid in photosynthesis and promote growth. Shine on, plant pals!

Image of Rhaphidophora tetrasperma by Hannah Neufeld (2021)
Freshly shined Rhaphidophora tetrasperma. Image by Hannah Neufeld (2021).

NEW SERIES: Glow Up to Grow Up

I’m excited to announce that I will be beginning a new series on the blog called Glow Up to Grow Up. In this 3 part series, I will be sharing all-natural, DIY recipes to keep your plants happy and healthy.

So, why plants?

It’s interesting to note that houseplants have seen a massive surge in popularity in the last several years, particularly with millennials.
There is plenty of evidence of the younger generations’ affinity for indoor gardening on social media, where hashtags like #plantsofinstagram, #urbanjungle and #plantsmakepeoplehappy are perennially trending on Instagram. In addition to Instagram, there’s also a flourishing online plant community on Youtube. Here’s a video of one of my favourite green thumbs on YouTube, Summer Rayne Oakes, discussing millennials and houseplants with the New Yorker:

Summer Rayne Oakes, founder of Homestead Brooklyn, discussing millennials and their houseplants with The New Yorker.

While social media has given us new ways to document our gusto for greenery, the houseplant trend is far from new. In fact, humans have been tending to potted plants for thousands of years, dating back to the hanging gardens of Babylon. Bloomberg News suggests that with “many millennials delaying parenthood, plants have become the new pets, fulfilling a desire to connect to nature and the blossoming ‘wellness’ movement.”

I’ve chosen to start this series because I am an avid indoor gardener and collector of houseplants like many people in my cohort. I have called it “Glow Up to Grow Up” as a play on the “glow up” videos frequently shared on social platforms.

The idea behind this series is simple, when we take care of ourselves well, we are rewarded with personal growth. So far, I have only shared affordable, DIY recipes for self-care and pet care on this blog, so I thought it might be time to give my plants a few spa days of their own.

Stay tuned for the first installment of Glow Up to Grow Up on August 8, 2021.

Here’s a preview of what’s upcoming in the series!

DIY Go Fresh Shower Gels (Lush Dupe)

Have you ever used shower jellies from Lush? In case you haven’t, here is a video that Lush posted that will give you an idea of what they are:

A friend recently gave me a Whoosh shower jelly. To be honest, I was initially bewildered and slightly repulsed by the concept of shower jellies. Why would I want to rub a gelatinous blob all over myself in the shower? Perhaps seeing the look on my face, my friend said, “Don’t knock it until you try it.” 

After using the Whoosh jelly for the first time, I was immediately converted. It produced an abundance of hydrating foam and had a delightfully zesty citrus fragrance. What is so innovative about these products is that they were designed to be travel-friendly and can also be used chilled. That’s right, unlike every other body wash product, shower jellies are designed to be frozen or refrigerated before use to create the feeling of fire and ice. While Lush recommends chilling these little wonders, they are also lovely to use at room temperature. 

Not too long ago, I finished my tub of Whoosh, and, despite my initial trepidations, I have sorely missed its jiggly, joyful influence on my morning routine. 

I found a couple of versions of this recipe online, one by Jamela Payne of By Pink, and one by Chrystal Johnson of Happy Mothering. I tried both Jamela and Chrystal’s recipes, but for some reason my jellies did not solidify. Using Jamela and Chrystal’s recipes as inspiration, I have created this recipe for DIY Go Fresh Shower Gels. 

To make this recipe vegan friendly, I switched out the unflavoured gelatin for agar agar powder, a cruelty-free gelling agent. My version also includes vegetable glycerine for its skin-softening effects. Additionally, I added in some sparkles for a little extra pizazz. Please note that you must use a cosmetic-grade variety if you plan to add glitter to your bath jellies, not the type intended for arts and crafts. 

Ingredients:

  • 1 1/2 cup boiling water
  • 1 cup agar agar powder
  • 1/2 cup of your favourite body wash
  • 15 drops essential oil (optional)
  • 2 tablespoons vegetable glycerine
  • Soap dye or food colouring (optional) 
  • 1/2 teaspoon cosmetic grade glitter (optional)

Supplies: 

  • Large bowl 
  • Measuring cups 
  • Whisk
  • Rubbing alcohol in a spray bottle
  • Small ice cube tray or candy mould 

Preparation:

  1. Add agar agar powder to a large bowl. 
  2. While constantly whisking, add boiling water and continue to stir until the powder has dissolved completely. 
  3. Next, add your chosen body wash and vegetable glycerine in and mix in thoroughly. 
  4. If you have chosen to use essential oils, soap dye or food colouring, and cosmetic-grade glitter, add them in at this point and whisk thoroughly. 
  5.  Carefully pour the mixture into your moulds and fill to the top. If there are any bubbles on the surface, you may eliminate them using your spray bottle filled with rubbing alcohol.
  6. Enjoy! 

When used in the shower, your should be able to lather your gels up like a bar of soap. I am still working out the kinks with this recipe. While these shower gels aren’t quite as addicting to use as the Lush original, they’re very close. 

Notes: 

For best results, take care to choose a body wash with a scent that complements your essential oil. 

Store your DIY Go Fresh Shower Gels in a cool, dry place and use them within three months. If you are going to be storing them in the fridge, take care to label them accordingly, so no one mistakes them for jello. These are not edible. 

I look forward to hearing your thoughts on this Lush dupe! As always, happy bathing, folks!

Completed DIY Go Fresh Shower Gels (Lush Dupe
Here’s the finished product! Image by Hannah Neufeld (2021)

DIY Magic Melt & Pour Apricot Seed Solid Body Scrub


For some people, certain products remind them of a particular time in their lives. When I was a little bit younger, I thought that a certain apricot seed face scrub would solve all of my teenage acne woes. Unfortunately, that product did little to soothe my spots, and, in time, I started using it as a body scrub before shaving. 

In the last several months, I have been trying to reduce the amount of plastic waste that I produce. When I was looking for an exfoliating body scrub recently, I could only find liquid varieties in plastic containers. I know that switching from liquid body wash to bar soap is often an effective way to reduce plastic packaging. This got me thinking, would it be possible to create a bar of soap that had the skin-softening benefits of that popular apricot seed scrub?

After doing some sleuthing on the web, I saw that another blogger had already pioneered a recipe to do exactly that (the internet is fantastic, isn’t it?). Today’s project was inspired by Chrystal Johnson’s Exfoliating Apricot Sugar Scrub Cubes recipe on Happy Mothering

When I tried Chrystal’s original recipe, which uses both apricot seeds and sugar as exfoliants, I found it to be a little bit overly abrasive for my sensitive skin. Today’s post will share a version of Chrystal’s recipe that I have modified for my fellow dry-skinned divas, DIY Magic Melt & Pour Apricot Seed Solid Body Scrub. 

Ingredients for DIY Magic Melt & Pour Apricot Seed Solid Body Scrub.
Ingredients for DIY Magic Melt & Pour Apricot Seed Solid Body Scrub. Image by Hannah Neufeld (2021).

Ingredients: 

  • ⅛ cup apricot oil or vegetable glycerine
  • ⅛ pound shea butter melt & pour soap base 
  • One teaspoon ground apricot seed 
  • 15 drops essential oils or soap fragrances of choice
  • 1/2 teaspoon powdered mica pigment or soap dye

Supplies:

  • Small silicone ice cube tray or candy mould 
  • Stirring utensil 
  • Measuring cups 
  • Double broiler 

Preparation:

Melt your soap base in a double boiler, frequently stirring, until it’s smooth.

Add the apricot oil, ground apricot seed, soap dye, essential oils or fragrances, and stir until well combined.

Pour the mixture into your ice cube tray immediately! Melt and pour soap bases set incredibly quickly, so time is of the essence. If it starts to harden before you have finished pouring it into your mould, you can put it back over the heat. 

Let your soaps harden for approximately 2-4 hours. If you are in a time crunch, you can speed up this process by cooling your soaps in the refrigerator.

Once they have hardened and cooled, pop out your Magic Melt & Pour Apricot Seed Solid Body Scrub bars out of the mould and store them in an airtight container. 

I hope you enjoy this recipe and that it leaves your skin nourished and silky smooth! 

DIY Magic Melt & Pour Apricot Seed Solid Body Scrub.
DIY Magic Melt & Pour Apricot Seed Solid Body Scrub. Image by Hannah Neufeld (2021).

DIY Everything’s Coming Up Roses Bath Salts

As you can probably already tell, I love to make bath bombs. I love to experiment with different ingredients, scent combinations, and there’s nothing more satisfying to me than watching them fizz in the bath. 

Bath bombs fizz due to a chemical reaction triggered when two of the main ingredients, baking soda and citric acid, are exposed to water. Because most bath bomb recipes also use water to help the dry ingredients stick together, making them is often a process of trial and error. While you want to add enough water, so your mixture is able to hold the form of the mould, you mustn’t add so much that you trigger the chemical reaction before you are ready for your bath. 

Because bath bombs are activated by water, it’s critical to pay attention to humidity levels in your home. If there is too much humidity in the air while you are making your bath bombs, they will not be able to hold their shape. It may even prevent the ingredients from binding at all, leaving you to clean up a crumbled mess. According to the Bath Bomb Guide, the ideal humidity for making bath bombs is between 35 and 40 per cent, which is not high enough to cause them to collapse or low enough to create cracks during the drying process. 

About a month ago, I was planning to make a batch of bath bombs as thank you gifts when I realized that my home’s hygrometer indicated that the humidity level was at 73 per cent(!). While I considered ordering a dehumidifier online, as the Bath Bomb Guide recommends, I needed to start making the thank you gifts immediately in order to finish them in time. 

In a time crunch, I decided to make some DIY bath salts as opposed to bath bombs. This was a great solution because bath salts, which have the same skin-nourishing, stress alleviating benefits of bath bombs, are less impacted by humidity levels. As they say, “necessity is the mother of invention.” 

Here is my recipe for DIY Everything’s Coming Up Roses Bath Salts. 

Ingredients:

  • 2 cups Epsom salt 
  • ½ cup baking soda
  • 2 tablespoons apricot oil
  • 15 drops rose essential oil 
  • 5 drops geranium essential oil 
  • 5 drops lavender essential oil
  • ¼ cup dried organic rose buds (optional) 
  • ¼ cup dried organic hibiscus flowers (optional)
  • 1 tsp mica powder colouring pigment or 5 drops food colouring or soap dye (optional)

Supplies: 

  • Large bowl(s) for mixing 
  • Stirring utensil 
  • Airtight containers for storage. 

Preparation:

  1. Mix apricot oil and essential oils. 
  2. Add in Epsom salt and baking soda and mix well to combine. 
  3. If you have chosen to use a colouring agent, add it to the mixture and stir thoroughly to combine. 
  4. If you have selected to use dried flowers, fold them into your salt mixture. 
  5. Store in an air-tight container.
  6. Use ½ – 1 cup per bath
Dried rose and hibiscus petals are a beautiful decorative addition
If you desire, dried rose and hibiscus petals are a beautiful decorative addition. Image by Hannah Neufeld (2021).
These bath salts can be made with or without colouring pigment and dried flower petals
These bath salts can be made with or without colouring pigment and dried flower petals. Image by Hannah Neufeld (2021).

Because I made these bath salts to use as gifts, I displayed them in 2 glass mason jars and one smaller glass container that looks like a test tube with a lid.

I hope you have enjoyed the recipe for these affordable, easy-to-make DIY Everything’s Coming Up Roses Bath Salts. As always, happy bathing, folks! 

Gift packaging for DIY Everything's Coming Up Roses Bath Salts
Gift packaging for DIY Everything’s Coming Up Roses Bath Salts. Image by me (2021).

DIY Surprise Inside Bath Bombs

Lately, it seems like everyone and their cousin has started to make bath bombs. In the last several years, there has been a surge of companies that produce bath bombs and individual hobby creators like myself. 

With so much competition in the market, it’s no wonder that bath bomb manufacturers have been looking for ways to make their products stand out from the rest of the herd. Some companies are attempting to differentiate themselves by adding surprises to the centres of bath bombs. According to the Bath Bomb Guide, this growing trend is referred to as “bath bomb embeds.” 

Bath bomb embeds are typically placed in the centre of larger bath bombs to add an element of satisfaction, excitement and surprise. There are numerous different types of embeds, including extra fizz, changing colours, a complementary aroma, or even a gift. To this end, one company, BathBombs.com, has been making a name for itself by using unique embeds such as jewelry, rings, charms, pearls, cash, toys, and zodiac paraphernalia. 

For my post today, I thought it would be fun to try out this fad for myself. For my embed, I chose to use a small rubber duck figurine. 

Ingredients for DIY Surprise Inside Bath Bombs.
Ingredients for DIY Surprise Inside Bath Bombs. Image by Hannah Neufeld (2021).

Ingredients:

  • 1 cup baking soda
  • 1/2 cup citric acid
  • 1/2 cup Epsom salt
  • Colouring pigment* – optional
  • 2 tablespoons apricot oil 
  • 1-2 teaspoons water
  • 15 drops essential oil or soap fragrance of choice
  • Embed of choice

Supplies:

  • Bath bomb mould
  • Mixing bowl
  • Measuring spoons & cups
  • Whisk
  • Spatula

Preparation:

  1. In a bowl, whisk baking soda, Epsom salts, and citric acid together. Set aside. 
  2. In a separate bowl, combine apricot oil, essential oils, and water. 
  3. In another container, combine the apricot oil, water, and essential oils. 
  4. Depending on how many different colours you want your bath bomb to incorporate, separate your base mixture into different bowls. 
  5. Add chosen colour pigment(s) to each bowl, mixing thoroughly to ensure even colour distribution. Your mixture should now have a consistency that is comparable to packing snow or wet sand. It should stick together when pressed between your fingers. 
  6. Start filling bath bomb moulds, alternating between colours as desired. Fill both halves of the mould until they are overflowing, leaving some room for your embed. 
  7. Insert your embed of choice and firmly press both sides of the mould together. 
  8. Allow your bath bomb to harden for at least 8-12 hours before using. 
  9. Enjoy! 
Finished DIY Surprise Inside Bath Bomb.
Finished DIY Surprise Inside Bath Bomb. Image by Hannah Neufeld (2021).

I hope you have enjoyed this recipe. Don’t forget to fish your chosen embed out of the tub before draining your bath, or else you could risk clogging your pipes.

Check out this video tutorial of me making my DIY Surprise Inside Bath Bombs.

Video tutorial by Hannah Neufeld (2021).

I look forward to hearing what embeds you use in your next bath bomb project. As always, happy bathing, folks! 

DIY All-Natural Aloe Vera & Glycerine Dog Shampoo

Chemical additives in household products are just as harmful to pets as they are to us. What’s worse is that many pets have sensitive skin and can’t tell us when products disagree with them. 

When choosing pet shampoo, it’s always best to err on the side of caution because your furry friend may have an undiagnosed skin allergy or sensitivity. I’m not sure about cats, but I know skin allergies are prevalent in dogs. I have to be extra careful with my dog, Teddy, because he has Canine Atopic Dermatitis (CAD). CAD is a common skin disease that causes itchy skin due to the immune system’s response to environmental allergens. You can learn more about CAD here

Today, I thought I would share a DIY dog shampoo recipe for all the canine lovers out there. Making your own dog shampoo is a simple way to purify your pet cleaning process so you won’t have to worry about harsh chemicals or toxic additives harming your pet. I have adapted an aloe vera & glycerin recipe from the American Kennel Club using all natural ingredients.  

Ingredients for DIY Aloe Vera & Glycerine Dog Shampoo
Ingredients for DIY Aloe Vera & Glycerine Dog Shampoo by Hannah Neufeld (2021)

Ingredients: 

  • 1 cup of water
  • 1/3 cup of baby shampoo or nontoxic dish soap
  • 1/8 cup of white or apple cider vinegar
  • 1/8 cup of glycerine
  • Four tablespoons of aloe vera gel

Supplies: 

  • One empty bottle for storage

I was going to include a photo of Teddy in his bath, but that turned out pretty much as I thought it would… Have you ever seen Because of Winn-Dixie?

Teddy sulking post-bath
Teddy sulking post-bath, image by Hannah Neufeld (2021)

Have fun pampering your pooch and don’t forget the extra towels!

DIY Bath Bombs

There are few things that I love more than a nice, long soak in a hot bath. When I was younger, I would spend hours each weekend submerged in the bathtub reading (and subsequently damaging) Beverly Cleary’s Ramona Quimby series. 

As an adult, a bathtub is one of the few dealbreakers I have when renting an apartment. I chose my first apartment in Montreal purely because of the gorgeous clawfoot tub. I was somehow able to overlook the fact that the apartment had a non-functional layout, only three electrical outlets, no natural light to speak of, and that it was on the ground floor of a decrepit building located in a seedy corner of downtown… I would come to regret my short-sightedness, but at the time, I only had eyes for the tub. It was antique porcelain and over 6 feet long. Perfection. To this day, I have never felt better about myself than I did stewing in that tub.

Bath bombs add a level of spa-like indulgence to any self-care ritual, but they typically cost $5-15 each, which adds up quickly. Fortunately, these fizzy, colourful treats are relatively simple to make at home. Moreover, the process of making bath bombs is a relaxing way to let your creative juices flow. With this basic recipe below, you’ll be luxuriating in a colourful, delightfully scented bath in no time. 

Ingredients:

  • 1 cup baking soda
  • 1/2 cup citric acid
  • 1/2 cup Epsom salt
  • Colouring pigment* – optional
  • 1 tablespoon cream of tartar
  • 2 1/2 tablespoons almond oil – or melted coconut oil
  • 3/4 tablespoon water
  • 12-15 drops essential oil or soap fragrance of choice

*I used mica pigment powder because it’s a natural product. Mica powder comes in a variety of vivid colours and gives bath water a subtle shimmer. Food colouring is another non-toxic option that is more affordable than mica powder. 

Supplies:

  • Bath bomb mould
  • Mixing bowl
  • Measuring spoons & cups
  • Whisk
  • Spatula

Preparation:

  • In a medium bowl, mix all of the dry ingredients. Add as much or as little colour pigment to achieve the desired look. Whisk to combine.
  • In a separate small bowl, mix the wet ingredients.
  • Add the wet ingredients to the dry ones very, very slowly. It’s important not to add the wet ingredients all at once, or you will activate the citric acid used to create the fizzing effect. When the ingredients are thoroughly mixed, they should have the appearance and consistency of packing snow or wet sand. 
  • Fill each half of the mould, packing the mixture in slightly until it is overflowing. Press the halves together firmly. Let the filled mould sit for one minute. Lightly tap the mould and gently pull it apart to remove the bath bomb. Let the bath bombs dry for at least 24 hours before enjoying in the tub.

Once you have mastered this basic recipe, you can customize your bath bombs with different shapes, sizes, scents, and colours. Bath bombs are a fun indulgence, and they make a great inexpensive gift. Make them in batches to use for yourself or to share.

Happy bathing, folks! 

Cooling, Calming & Clarifying DIY Facial Toner

Generally, by this time of year in Canada, spring has (read: almost) sprung. When I was in my mother’s backyard this morning, I noticed that the daffodils, tulips, crocuses and hyacinths are already in full force. I always like to see the first spring flowers, but I’d be lying if I told you that there wasn’t a tiny part of me that was filled with dread at the sight of these cheerful early-bird blooms. 

Why? Because, well, after spring comes summer.

Confession time: I don’t particularly enjoy the summer. I don’t fare well in heat or humidity—they wreak havoc on my sleep, skin, and hair.

Today, I thought I would share a recipe that made the last couple of summers slightly more tolerable: DIY Lavender-Rosemary-Mint Cooling, Calming & Clarifying facial toner. 

While this is generally a DIY natural beauty fix that I reserve for the summer months, I have been keeping an atomizer of this in my purse since last year to combat ‘maskne’, because let me tell you, the struggle is real. Everyone’s skin is different, but for me, this works

What you will need: 

Supplies: 

  • 1 small-medium sized pot 
  • 1 colander or strainer
  • 1 atomizer and/or 1 large mason jar 

Ingredients: 

  • 1.5 cups near-boiling water 
  • 1/2 cup fresh mint leaves 
  • 1/8 cup fresh rosemary needles 
  • 1/8 cup dried lavender petals 
  • 1/3 cup witch hazel* 
  • 10 drops tea tree essential oil*

*You can adjust the amount of witch hazel and tea tree oil in this recipe depending on how astringent you want your toner to be. 

Preparation: 

1) Wash the sprigs of mint and rosemary thoroughly and remove the mint leaves and the rosemary needles from their stems. 

2) Place the herbs in a pan and cover them with water. 

3) Allow contents to simmer, keeping a close eye on the stove. Once the water is almost boiling, remove the pan from heat and add in dried lavender petals.

4) Set aside and allow water and herb concoction to cool to room temperature. 

5) Once the mixture has cooled, strain out the herbs and lavender. 

6) Add in witch hazel and tea tree and transfer to a storage container. 

This recipe can be kept at room temperature for up to 2 weeks and up to 1 month in the refrigerator. Enjoy!